Enhancements, Features and Upgrades It’s in the Firmware

Enhancements, features and upgrades to several of the printer families over the first half of this year.  Make sure you are getting the most out of your printer or multifunction device by keeping the firmware updated.

For instance, all my VersaLink peeps there is an upgrade that will fix the issue of unable to log into printer webui as admin when connected with Google Chrome. I have seen comments on the Xerox Customer Support Forum and in the comments of the At Your Service blog wondering about compatibility with Chrome.  So if that has an issue for you and your VersaLink, upgrade your firmware to fix that issue. 

Currently you will need to check out the Product Enhancement document to read about the additions, fixes in this new firmware, and get the link to go directly to the correct firmware upgrade for your model machine. The new firmware can only be accessed through the links in the document at this time, it has not been uploaded to the site yet.

All Xerox printer and multifunction operators or administrators need to make it a regular practice to  check the drivers and downloads tab of the support page for your machine to see if anything new has been released.  You can find information on the new features, enhancements and fixes by reading the release notes or “readme” file that is available with the upgrade(s).  Set a reminder on your calendar to make sure you check for updates. 

Firmware updates are found on the Drivers & Downloads tab on the support page for your printer.  You may need to scroll down to find the Firmware section.  Most firmware updates come with installation instructions but if not we have you covered. Just navigate to the Support tab for your printer and search on “install firmware” or simply “firmware” to find detailed step-by-step instructions on the ways to install the firmware.   

Head over to your support page now and check for any updates. Who knows you may find a feature you did not even know you were waiting to see. 

Creating Favorites in Your Address Book

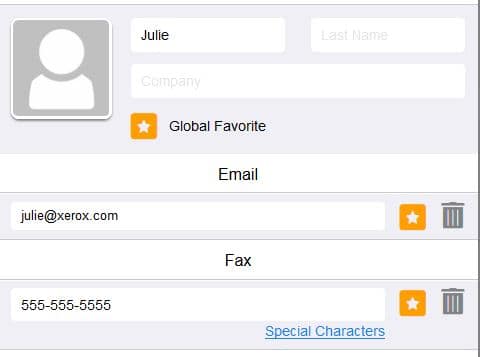
Designate email addresses, scan and / or fax locations as favorites in your address book on your Xerox multifunction printer.  Using favorites makes programming your job just a little quicker.  Use favorites for those locations that you use frequently. A star next to the entry designates favorites as shown below.

The favorites feature is not available on all printers but if it is on yours, it is easy to set-up and saves you some time. 

Let’s take a look at the steps for designating an address book entry as a favorite. These steps are directly from the online knowledgebase, available 7 days a week, 24 hours a day, for your convenience.

VersaLink and AltaLink Instructions

Manage Favorites in the Device Address Book

You can mark contacts that you frequently use as favorites. A star next to a contact in the list indicates a Favorite. You can mark a favorite as a Global Favorite for all services or as a Favorite for email, fax, or scan to destinations.

To manage favorites:

  1. Access the Embedded Web Server and if necessary, login as System Administrator. See the Related Content section for additional information.
  2. In the Embedded Web Server, click Address Book.
  3. To edit a contact marked as a Favorite:
  4. Select the contact from the Favorites list for the appropriate section, then click Edit Favorite.
  5. Edit the contact information as needed, then click Save.

To clear a contact marked as a Favorite:

  1. Select the contact from the Favorites list for the appropriate section, then click Delete Favorite.
  2. Click OK.
  3. Logout of System Administrator mode.

WorkCentre Instructions

Save an E-mail address as a Favorite

This option must be made available by your System Administrator. If Authentication or Accounting has been enabled on your device you may have to enter login details to access the E-mail features.

You can mark a favorite as a Global Favorite for all services or as a Favorite for e-mail, fax, or scan to destinations. You can identify a frequently used contact by marking the contact as a Favorite. A star next to a contact in the list indicates a Favorite. Use the Favorites option to quickly access regularly used locations. The Favorites are saved in the Address Book.

Your System Administrator can choose to hide this option. If you need to add a favorite and don’t see the star icon that lets you add an address to the favorites ask your System Administrator to enable the option, or use Internet Services to add the favorite.

From the Machine:

  1. Press the Clear All button on the control panel to cancel any previous programming selections.
  2. Press the Services Home button.
  3. Select the E-mail button on the touch screen.
  4. If required, select the E-mail tab. This is usually the active tab when the E-mail service opens.
  5. Select the Address Book button. The name of the button will vary depending on the type of address book your System Administrator has installed or set as the default address book, for example the button may be labelled Device Address Book or Network Address Book.
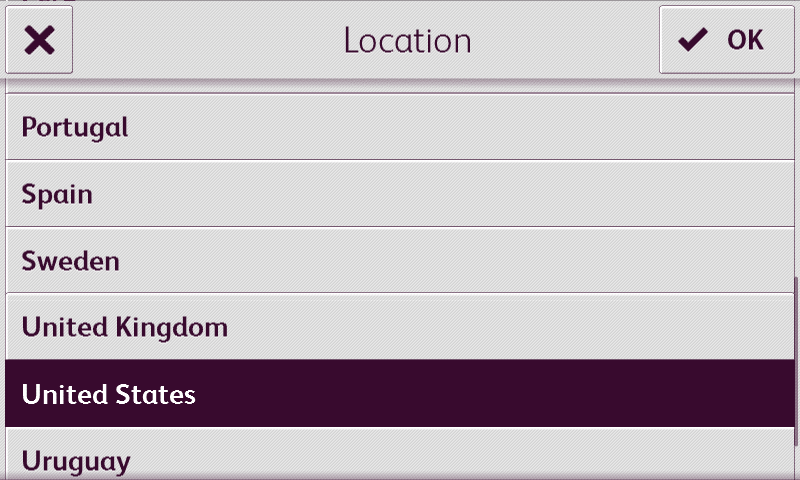
  6. Select the Address Book type from the drop-down menu to the left of the Enter name entry box.
    • If required, select the Search button to search the device address book. Use the touchscreen keyboard to enter the recipient details. If you don’t know the full address enter the partial address, then select the Search button.
  7. If required, select the Search… button and use the keyboard to enter the recipient or group name. If you don’t know the full name enter the partial name, then select the Search button.
  8. Select the recipient required.
  9. Select the Details button.
  10. Select the star icon on the right of a field to add that contact detail to the favorites.
  11. Select the OK button.
  12. Select the Close button.

From the 
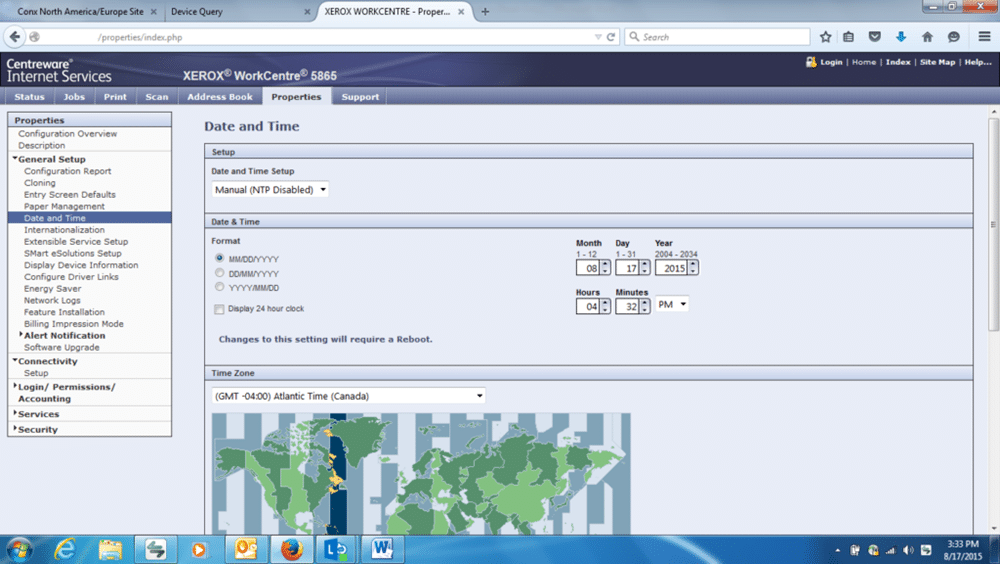
CentreWare Internet Services:

  1. Access CentreWare Internet Services (CWIS) and if necessary, login as System Administrator.
  2. Click the Address Book tab.
  3. Select All Contacts.
  4. To edit a contact marked as a Favorite, select the contact from the Favorite list for that section (E-mail, Fax, Scan To Destination) under the Address book section, then click Edit Favorite.
  5. To mark a contact as a Favorite for e-mail, fax, or scan to destination, when adding or editing the contact, click the star next to that field.
    If you click the star next to Display Name, the contact becomes a Global Favorite.
  6. To clear a contact marked as a Favorite, select the contact from the Favorite list for that section, click Remove Favorite or Delete Favorite, then click OK. The contact is removed from the Favorites list for that section.
  7. Click Save.

Disclaimer:  Not all features will be available on all machines it will depend on the configuration of the machine.  The steps above are general and may vary a little from what you will see on your machine or screen. Please refer to the support pages for your model of printer and search on favorites to see if the feature is available to you.

If you use the address book in your daily business processes please consider trying out the Favorites Feature to save you some time. Benjamin Franklin in 1748 said “Remember time is money”. 270+ years later it still holds true!!

Redaction Needs? There’s an App for That!

It’s in the news a lot these days.  “Personally Identifiable Information”, or PII.  Everybody has some.  Quite a bit of it, in fact.  Social Security numbers, birth dates, credit card numbers, email addresses, medical conditions, telephone numbers, home addresses.  It’s out there more and more all the time.  And, I’m not happy about that.  Keep your hands off my PII! 

Your clients are also concerned that you know too much about them. Keeping their PII secure is a big responsibility.   But, you got this.

Introducing the Xerox Auto-Redaction App, our latest app that allows your Xerox ConnectKey-enabled devices to act as your personal redaction service.  Available now for download from the Xerox App Gallery, the Xerox Auto-Redaction App can help you protect your customers’ PII, whether they are managing legal, healthcare, or government documents to name a few.

The app allows you to select from an ever-growing number of standard redaction items and to optionally create custom presets or templates that can be saved and re-used in your particular workflows.

Additionally, you can create custom redaction items simply, by typing in words or phrases that you want to keep private.  Want to redact the code name for an internal program?  Create a custom redaction for it.  Want to redact prices off a quote?  Use the dollar $ sign in a new custom item and select “Words Containing”.

You can even preview what the redacted pages will look like before having them printed and/or emailed to you or others as a PDF file. If emailed, recipients can open the PDF file with a redaction editor like Adobe Acrobat Pro and make any additional edits that may be required.

Not located in the US?  No problem!  In addition to the redaction items that have common formatting across the globe, like dates, time, addresses, and names, the Xerox Auto-Redaction App also supports certain country-specific redaction items, like US SSN vs. the Canadian Social Insurance Number (SIN).  Simply select the region you are in to see those additional redactable items.

Think about how useful this could have been for Paul Manafort’s lawyer!

Ready, Reset, Start Over on Your Printer

Have you ever just wanted to start over? With your printer you just might be able to start over. Let’s say your Xerox printer is moving to a new location or a new group and you want to reset the machine, erasing all the settings and information stored on the printer, there is a way to do that reset on most devices. You can reset the machine to the factory defaults and start all over. The process of setting the machine back to the factory defaults makes the machine like it was when you first took it out of the box, okay so it is used but most settings will be back to the factory defaults as though it was new.

Most Xerox printers and multifunction devices provide this option and if the instructions are not in the Online support for your product. If you do not find the instructions then give the support centre a call and they can either walk you through the process or let you know if resetting requires a technician. Obviously, this is an optional process and may not need to be done, but if you need to clear the machine to send it on to another owner or department this is an option. In rare cases the reset may be suggested for machine issues. To find the instructions to reset the machine please go to the support site for your machine and search on “reset” or “factory defaults”.

Resetting will return the many stored parameters to the factory default values.  In most causes the print counts and the firmware serial number will not be affected by the reset.

Warning: All or most user and system settings will be lost.  All jobs, presets, Apps (if applicable), and device settings are reset. If the printer includes a hard disk, the disk is reinitialized.

We recommend that you print out a configuration report or Systems setting report prior to resetting so that you can use the report as reference to restore the printer settings you wish to set up again. Please search on “configuration” or “settings report” in the online support section for your machine for the instructions for printing the report.

If you have any questions about this process as always please contact us at the support centre.

For Your Viewing Pleasure – WorkCentre 6515, Phasers 6510 and 3635 Users

WorkCentre 6515, Phasers 6510 and 3635 users and operators please stop by the Xerox Support YouTube channel to check out new content.  Many new videos have been uploaded for these models in the last few weeks.  These videos run the gambit from How to Unbox and Power On to Setting Up Wi-Fi Network and so many features in between. 

Head over to the Xerox Support YouTube channel and check them out.  They offer full step-by-step instructions to help you get set-up in no time.  Many of the popular features and set-ups are covered.  For example scanning and driver installation are covered.  This library of videos help you to get the most out of your printer.  Maybe even introduce you to features you have not used yet. 

We want you to get the most out of your printer that is why we continue to update and post new videos.  For example, there is a video for scanning to Windows 10 PC folder. I have posted that video below. 

As you can see from this video, the steps are easy to follow and take you through the entire process in a little over 4 minutes.  You can pause the video to complete steps before continuing on to the next step.  That makes these videos great for training or just a refresher.

On the channel the playlists have been created for each printer model so you can easily find the information that is important to you.  However, remember that some of the features are similar from printer family to printer family so you may be able to find help with a feature in another printer’s playlist.  This is especially true for video about step ups on the PC or Mac.  As an example the videos for adding / installing the driver on the PC or Mac is basically the same from printer to printer so if there is not a driver install video on your printers play list search for driver install to find one that might work for you.

Grab the popcorn and head on over to YouTube Xerox Support Channel and watch some videos.

Help Shape Support With Your Feedback

If you have been a frequent reader of this blog you know that I champion our Online Support in almost every blog. I must say I am proud of our Online Support and think it is a wonderful resource to find instructions and help with your Xerox devices and software. We really do want to hear what you think about our online support that is why we give you the opportunity in every solution to let us know how we are doing.

Please let us know when we do something right. When you go to the support pages and find a solution that works for you please let us know. All you have to do to rate the solution is to click on the stars rating next to the question “Did this page help?”  Select the number of stars you would like to rate the solution with, 1 being lowest and 5 the highest.  We really do look at these ratings, it helps us know what type of cases, and solutions help you out the most. With that information, we can build better knowledge bases that are more helpful for you.

Please also let us know your suggestions and comments for what you would like to see added or changed in the knowledge bases or any other information you would like us to know. You can supply us with this information by clicking on the “Provide Feedback” link. Here is an example of what you will see at the end of every solution. I have been talking about these links.

We want our online support to be the best and we want it to help you be self-sufficient when using and troubleshooting your equipment or software. We know we cannot answer every question for every situation but with your help we can get the most common information up there for you to see and you can have a hand in making sure the information you need is there for you and others that use the same machines and applications that you use.

Consider helping us help you and other customers. We appreciate your input.

Device Compatibility Pack for Drivers

A Device Compatibility Pack (DCP) is a compressed file archive containing product specific data including device images, driver constraints, device capabilities and more. The Global and Mobile Express print drivers rely on DCPs and their contents to know how to print to specific products. There is a Xerox DC TIP which has recently, (December 2018), been updated.  The tip document explains in detail how DCPs work and how to install them in your environment. These Device Compatibility Packs are for the Windows environment and are not compatible with Apple Mac.

The Global Print Driver® and Mobile Express Driver® will have installed one DCP for each product the driver supports. To add support for another product, the product’s DCP must be installed. A printing device for which the Global Print Driver and Mobile Express Driver does not have a device compatibility pack is considered an unsupported model and should default to the Basic mode.

Device Compatibility Pack (DCP) updates are also for legacy products that may not have new drivers developed for new operating systems. DCP updates can be setup to automatically update or they can be manually updated. 

The DCPs provide you with a means of acquiring product data (e.g. device capabilities, constraints, images, etc…), for a device without having to go through the time and effort to download and install a new Global Print Driver or Mobile Express Driver. This is a means of updating the driver without re-installing or breaking WHQL (Windows Hardware Qualification Lab) certification. Users of the Global Print Driver or Mobile Express Driver no longer have to download and install new drivers when new devices are added to their environment. The DC Tip is a guide for systems administrators and peer-to-peer clients in the process of acquiring and installing DCP updates for the Global Print Driver and Mobile Express Driver.

The DC Tip includes links to DCPs and full instructions for manually or automatically installing updated device compatibility packs. If this is an issue you need information about see the DC TIP and if you need additional information give your local support centre a call.

Time to Connect

The time to connect is now.  To connect the time has to be right. What does that mean?  It means that in order to take advantage of the Xerox Remote Services the date and time on your printer has to be set and correct.  When you look at your Xerox device and see the incorrect date and time; that could be the reason you are not receiving the most accurate invoice or your device supplies.

An important requirement for Remote Services is that the device is setup with the correct date and time. If this setting is not correct or the device has not been setup with a date and time, then it will not be able to communicate or be able to send meters, supply and diagnostics data to the Xerox servers; to correct this information follow the steps below.

  1. Open the device’s web page CentreWare Internet Services (CWIS) from any Internet Browser on your PC or MAC computer using the IP address of the Xerox device.
  2. Select the “Properties” Tab from the top menu
  3. Expand “ General Setup” on the left side menu
  4. Check the Date and Time on your Xerox device by clicking “Date and Time” under General Setup
  1. If there was no Date and Time setup or you had to change the Date, Time or Time Zone, then the device will take at least 4-5 minutes to reboot itself once you apply the changes
  2. Test the Device’s communication via the Device web page by selecting Properties  > General Setup > Smart E-Solutions setup >  Select “Test Communication Now” button.

The screen below shows the Test Communication as it is happening.

If the “Test Communication ” is successful you will see the following screen

If the Test Communication Fails. Then further troubleshooting is needed to configure the Remote Print Services (formerly known as Smart E-Solutions) support on your Xerox device.

The link below gets you to the Xerox Remote Services Support page that will help you setup your device. Just click the link for instructions Xerox Remote Print Services Support Page

Keep in mind that many newer Xerox Devices come with the Remote Print Services available, some of our more mature (older) Devices require a simple and free download of a Device Manager software called Xerox Device Agent (XDA).

To get more information about these features, check out the Remote Print Services at Xerox.com that covers all the information and has many useful links.  A Device Eligibility Test will let you know if your Device(s) can take advantage of the Remote Print Services.

If you have security questions, check out the FAQ for Remote Print Services that will answer your questions concerning security.

In addition, there is Security White Paper that can answer any security concerns about the Remote Print Services.

Cleaning Your Way to Great Print Quality

Time for a reminder about cleaning your Xerox printers and multifunction devices. I know for most of us cleaning our offices comes down to a sweeping glance and a promise to do it later.  Later just never seems to come.  However, what if I told you your prints and copies can look like they did when you got your printer?  It is simple to keep up your print quality by remembering to clean your printer.

Several places can and should be cleaned in your machine to keep it running at its best.  Everything from the scan glass to the rollers can affect the look of the outputs from your device.  For example if you are seeing spots or dots on your copies or scans there may be something on the scan glass creating the defect.  Cleaning the glass regularly keeps the spots away. Cleaning both the platen glass and the Constant Velocity Transport (CVT) glass are important to maintain good quality copies and scans.  Here is an example of cleaning the platen glass.  Search on CVT on YouTube Xerox Support channel for cleaning instructions for the CVT glass. 

When printing if you see lines or streaks you may need to clean transfer belt, printhead lenses and or the paper path.  Information on how to clean all these components is found – say it with me – on the digital support pages for the printers.  Simply navigate to the digital support page, enter the model of your machine and select support.  On the support page search on clean or select the Maintenance/Consumables link on the right.  You can also check the video tab for videos on how to clean the machine.  Not all machines have cleaning videos but many do. 

Another source of cleaning information in the form of videos is the Xerox Support YouTube channel where you can search for your model or by the word clean.  The videos on the Xerox Support YouTube channel are on the digital support pages but I like to give you options for finding support in the way that is easiest and most convenient for you.

Lastly, the cleaning instructions may be as close as the display on your printer. Many of the devices have support built right in that you can access from the user interface on the printer.  That way you can watch the how to clean videos right at the machine.   

Regardless of how you chose to find the cleaning instructions it is important to clean your machine to keep it producing quality images. Isn’t it time to clean your printer?

Productivity Tools Help You Succeed

I would like to share with you a couple of tools that can help to increase your productivity by helping you understand the user interface and our device management tool CentreWare Internet Services. The tools are the user interface simulator and the CentreWare Internet Service (CWIS) simulator.

These simulators will help you learn to navigate the user interface and CWIS.  The simulators will help you to train new users on important aspects of the printers.  The simulators can also help your administrator(s) smoothly walk people through setup or troubleshooting by referencing these tools.

User Interface Simulator
VersaLink

The simulator is not to be confused with the Remote Control Panel feature.  The simulator is more of a training tool; you cannot actually configure the printer from the user interface simulator. To program the machine remotely you would use the Remote Control Panel of the printer.  

The simulators are examples and may not completely mirror your user interface and CentreWare Internet Services screens because of options and features you may have on your machine that may not be represented on the simulator screens.  The screens and tabs have interactivity so that you can review the main tabs as well as options on the tabs.

These tools can be found on the Xerox® productivity site.  Along with the simulators, there are also other tools, software and apps introduced on this page.  Please review the other items available, they may come in handy for your work processes.

I hope you will find the simulators handy and useful in your businesses and that they save you some time.  Consider bookmarking the Xerox Productivity site  page as a resource for other productivity tools.