Standard Time is Back for Most of Us

This image has an empty alt attribute; its file name is fall-1024x653.jpg
It’s Fall Y’all!

It is Fall y’all, and standard time is back. It’s that time of year to go back to the past by one hour this weekend.  If you live and or work in Hawaii, Arizona, Puerto Rico and all US Territories including Guam and the US Virgin Islands you can stop reading now.  The rest of you we get to fall back and get an extra hour of sleep. It is important to remember to change your clocks back one hour at 2 a.m. on Sunday Nov. 1, 2020. You don’t have to do it at exactly 2 a.m. but just make sure you change the time. If you don’t you will be early to your appointments or events on Sunday.

After you change your clocks, check the clock(s) on your Xerox Products. Make sure they are set for the correct time. If the device time is not set correctly it can cause confusion. Times may be incorrect on faxes, activity reports, banner pages and other time sensitive reports and activities. It is possible that printing will not work. If the printer is connected to a network and the printer and your network are not set for the same time it may not print.

Many of the printers and multifunction printers have the Network Time Protocol (NTP) or Simple Network Time Protocol (SNTP) feature. This feature synchronizes the internal clock of the Xerox device over a network connection. SNTP or NTP must be enabled and configured at the device for this automatic feature to work.  For instructions on enabling SNTP or NTP if available on your device, navigate to the support pages for your device(s) and search on “NTP”.  The search will bring you articles and step by step solutions for how to enable SNTP or NTP if applicable to your device.

You can also search on Daylight in the online support for your printer to learn how to set the Daylight Savings Time option, if your machine includes the feature. With the daylight savings option you can toggle the option on or off. If you choose Off the time will not change automatically for daylight savings time and standard time. The time need to be changed manually. If you toggle it On the printer will adjust for daylight savings time and standard time automatically at the correct date and time.

Whatever method you choose please check on your printer or multifunction device on Monday November 2nd. Check the time and make sure it went back to the past one hour with us.

Change those clocks, replace the batteries in the smoke detectors and carbon monoxide monitors. Enjoy your extra hour if there is any of it left!

Gmail and Scan to Email Set-Up Update

Are you having issues getting your scan to email to work with Gmail by Google?  You may need to make changes in setting-up your Xerox printer or multifunction device to scan to email with Gmail.  The security update will provide more security when connecting to Gmail. The network settings update provides instructions on setting up Wi-Fi as your primary network.  This blog provides some additional steps not found in the At Your Service Blog from September 2019 titled Gmail and Your Xerox Multifunction Printer.

Security Update

Note: This will work if you have two-factor authentications enabled. 

Instead of using the Less Secure Apps as recommended in the original article you can create an app password. The app password will make the scan to email more secure when the printer accesses the Gmail servers. 

Create a Gmail App Password

To create a new application-specific password so you can access your Gmail account in an email program or service using POP or through IMAP:

  1. Open Gmail in a browser.
  2. Click your avatar or name near the top right corner.
  3. Click Manage your Google Account on the account sheet that is displayed.
  4. Go to the Security category on the left side of your Google Account page.
  5. Click App passwords under Signing into Google. Type your Gmail password under Enter your password if prompted and click Next.
  6. Click Select app below the list of existing app passwords.
  7. Choose the application for which you create the app password, in this case Mail.
  8. Select a device from the device dropdown.  Select Windows Computer or choose Other to name the device.
  9. Click GENERATE.
  10. Click DONE.
Notes:
  • The password will be 16 characters long.
  • Enter the password into the mail app or write down the password and then enter it into the mail app. 
  • Do not include the spaces.
  • Once you enter the password do not save the password anywhere; if you lose it, create a new app-specific password.

Setting Wi-Fi as Primary Network (Optional Settings)

Notes:
  • This information may not necessary for all setups. 
  • The steps will vary by machine model. 
  • Steps may also be found in the support pages for some printers. 
  • Not all printers have Wi-Fi capability. 
  • Setting up the primary network to Wi-Fi may be a possible solution for errors when trying to configure scan to email to a Gmail account. 
  1. At your computer, open a Web browser. In the address field, type the IP address of the printer, then press Enter or Return.  You can find the IP address of your printer on the configuration or settings report for your printer. 
  2. Click Connectivity.
  3. Click Wi-Fi.
  4. Select Common.
  5.  Select Primary Network.
  6.  Choose Wi-Fi.
  7. In the TCP/IP Settings area, click on IP Mode and select IPv4.  DNS.
  8. Click on OK
  9. Click on DNS
  10. Turn OFF Use DHCP to assign a Static IP address, additional options will be displayed.
  11. Set Primary Server to your router location. For example, 192.168.1.1, this is a common router designation.
  12. Set Alternate Server to 8.8.8.8. Note the 8.8.8.8 is the Google DNS service and is likely to remain the same.
  13. Click OK
  14. Click OK on the final window.

As with any general solution provided your screens may be a little different depending on the model of printer you are using and / or the version of firmware you have installed.  If you have any questions, please contact your local support centre for further assistance or post your questions to the Xerox Customer Support Forum for replies from your peers.   

Build Your Own Office Assistant: AltaLink 8100 Series

Building your own virtual office assistant sounds like a great idea! You can’t do it with people, but you can with the new AltaLink 8100 Series.  There are two product lines: the AltaLink C8100 for color printing, and the AltaLink B8100 for monochrome (black and white).  In each product line, there are five models with different speeds ranging from 30 to 70 pages-per-minute (ppm) and different duty cycles. One of them is sure to be the right starting point for building your new virtual office assistant.

Once you choose your printer, you can begin to customize it with a wide variety of features and functions that can help you improve your productivity. Watch the following video for to get an overview of this customizable system.    

Let’s look at some of the options you can customize for your needs:

  • Finishers
  • Paper Trays
  • Long Sheet Feed for banners up to 52 inches long
  • Network Accounting
  • Walk-up Fax

These are just a few of the available options and there are many others to choose from.

Another way to explore the new AltaLink 8100 series s to review the User Interface Simulator.  The simulator will show you the screens.  Look on the bottom left of the screen to find another button labeled “New AltaLink Features”. Press the button and you can walk through some of the newly available features.

Once you have looked at the possibilities, review the Product explorers. The explorers for AltaLink C8100 and the B8100 series will help to build your office assistant from the ground up.  Choose which features will work best to meet the challenges and needs of your work processes. You can always go back and edit, change, remove, replace or add more features later.  

The customization of this series gives you the flexibility to include what you need and leave off what you don’t.  No more cookie cutter printers.  For more information review the Xerox® AltaLink® Family of High-Volume Printers site, which contains many additional links, instructions and supporting documentation.

Technical support is available on the product support page.  The support page includes “how to” instructions and troubleshooting as well. Also included downloadable printer drivers for computers and devices, downloads, documentation, videos and contact information for additional help. 

Explore the possibilities of customizing the AltaLink 8100 series printer to create your new virtual office assistant – one that doesn’t even take a lunch break.  It could be the best assistant you have ever had. 

The New Look for Educators in 2020

Things have changed a lot since the 2019 school year.  As the 2020-2021 academic year gets underway this fall, educators have been asked to pivot and adapt quickly. Educators must meet fast-evolving health and safety guidance around the COVID-19 pandemic. They are responsible for keeping students, parents and themselves safe – all while still providing a strong educational foundation. Whether it’s all remote learning, a mix of remote and in-person instruction, or some other program, we’re dealing with a new educational reality. This new reality comes with its own unique set of challenges for everyone involved in the school system.

One thing doesn’t change when it comes to education: the use of documents to help students learn. Whether in the form of papers, diagrams, illustrations, photos or other graphics, teachers rely on printouts, worksheets and lately, digital documents on screens to help their students grasp new concepts. Educators will still be using scanners and printers even when teaching in remote or hybrid situations.  Here’s how. 

Our Xerox printers and scanners are also here to help students and their parents through their unique schooling situation and needs. Xerox multifunction features can be used to scan in and email or fax documents to a teacher or the school., from papers tot permission slips to important health and medical information.  Tip for parents: when using a Xerox Printer or Multifunction device at your workplace for a child’s educational purposes, please make sure you have permission from supervisors first – we don’t encourage unauthorized use.

Template Library

Teachers may find the free Xerox template library particularly useful this year.

Visit it and find free printable signs, motivational posters and student achievement certificates for your classrooms and students. There are also calendars, planners, flyers and presentation templates and much more.

Copying these templates, or other worksheets on your Xerox multifunction device can help make your teaching job easier and faster. You can produce workbooks, pop quizzes and any other kind of handout. Leverage the great features of your Xerox equipment to help you with all the functions of your job

Xerox App Gallery

Another resource for educators is the Xerox App Gallery, an expanding collection of downloadable apps for your Xerox ConnectKey printers and MFP (multifunction printer) as well as the VersaLink and AltaLink families of printers. Apps from the gallery help to simplify complex or repetitive, time-consuming processes and extend your printer’s capabilities.

Xerox offers some of the most popular and widely-used productivity apps, from Google Drive to Microsoft Office and DocuSign, in addition to many others.

There is even a specific category for education apps available. All the descriptions are paraphrased from the descriptions available for viewing in the App Gallery.

Connect for Blackboard

Connect for Blackboard is a Xerox® connector app to Blackboard Learn™, the learning management system for higher education where teachers and students can collaborate, upload and store documents for classes.  With this app you can scan hardcopy course materials right at the MFP.

Connect for Moodle

The Xerox Connect App for Moodle requires a Moodle account. The app digitizes hardcopy documents.

Remark Test Grading

Connect for Remark Test Grading is a Xerox® app to connect to Gravic’s cloud-based test grading service. Educators can access the Remark Test Grading Service at the MFP and print bubble tests for their class, scan in the completed answer sheets, and generate instant results.

Xerox Proofreader

This app is only available for English language.  Xerox Proofreader Service gives you instant access to a powerful tool that checks for spelling, grammar, style, and plagiarism right from the MFP.

Book2Go

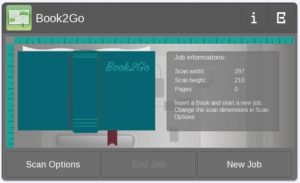
The Book2Go app is for providing scan functionalities to devices at public places such as. libraries, colleges, universities etc. without the need to be part of the local network.  You can try out this app for 30 jobs. After the trial period a purchase is required to use this app.

These apps all come with a trial so you can try them out first.  Most apps are available in multiple languages, see the app descriptions for a list of the compatible languages. Documentation and support for the apps is provided in the individual app pages in the app gallery.  While you are in the App Gallery check out the other apps available in addition to the education apps, such as a cloud or business app , that would help you further automate your processes. 

Educators are remarkable people and need all the help they can get in preparing items to teach our children. Xerox wants to help maximize your use of your Xerox equipment so please explore these options and contact us if you have any questions.

Xerox® Smart Start: Get Smart, Stay Smart

The Xerox® Smart Start is software designed to help Microsoft Windows users install the proper print drivers for their Xerox print and multifunction devices. Not sure which print driver to use? This installer program will help guide you.

The installer also allows more technical users to make their own selections before installing a Xerox printer.

Xerox Smart Start software searches the local subnet for supported Xerox printers using SNMP. It will also detect subnets used by existing printers and search those networks for new printers. Smart Start also allows you to search for specific network printers using hostname or IP address.

Xerox Smart Start performs the following:
  • Xerox Printer Discovery
  • Choose Quick Install to automatically download the best driver from Xerox.com and create a selectable printer option on the computer quickly, or Advanced Install which allows admins to select PDLs or pick which printer(s) they want to install
  • Make recommendations on which driver provides the best experience
  • Upgrade existing Xerox printers with the newest driver releases
  • Easily install Xerox TWAIN and WIA scan drivers for supported devices through the Advanced Install option
Xerox Smart Start software supports the following Windows Operating Systems:
  • Windows 10
  • Windows 8.1
  • Windows 7sp1 (Type 3 drivers only)
Where can I find Xerox Smart Start?

Xerox Smart Start is a standalone installer. It requires administrator rights to download and run the .exe. It can be downloaded from www.support.xerox.com. Follow the below produce to access the software.

  1. Go to the Xerox support website
  2. Select Printers
  3. Choose desired Product Family (example: VersaLink)
  4. Choose the desired Model (example: VersaLink C7020/C7025/C7030 Multifunction Printer)
  5. Select the Drivers & Downloads tab
  6. Select Xerox Smart Start – Driver Installer

For additional information read the Xerox Smart Start Customer tip. For more in-depth information on installation and use, including the printers compatible with the Xerox Smart Start look at the Xerox Smart Start User Guide.  As always you can contact your local support centre for additional support. 

iBeacon for AirPrint on AltaLink® Printers

The Apple iBeacon option simplifies the process by which your AirPrint-enabled Apple device, such as iPhone, iPad or Mac computer, can discover nearby AltaLink® printers and removes the need for AirPrint clients to be on the same subnet as the printer.

When the iBeacon Bluetooth® adapter is installed and configured, the printer broadcasts basic printer discovery information that includes a routable IP address, using the Bluetooth Low Energy beacon. With the use of the iBeacon, Apple device users can discover and connect to AltaLink printers nearby and print to them using AirPrint. Depending on the application they are using, a user can select a file on their Apple device, go to the share or additional options, and select the Xerox AltaLink printer as a print destination, all wirelessly and without installing any additional drivers.

From the article in online support for the AltaLink products here are the requirements for using iBeacon for AirPrint with your AltaLink printer.

Requirements for Using the iBeacon option:
  • USB port on the AltaLink is enabled.
  • Install the iBeacon Bluetooth adapter into a USB port on the rear of the AltaLink printer.
  • Enable iBeacon.
  • Enable IPP.
  • A routable, non-link, local unicast IPv4 or IPv6 address is configured for the active network interface of the device.
  • The active interface is Ethernet or wireless.
  • AirPrint client needs to reach the printer using the IP address that the iBeacon is broadcasting. If the printer has multiple routable IP addresses, the system administrator can select the IP address for the iBeacon device to use.
  • The printer can have the following IP address configurations:
    • An IPv4 address
    • An IPv4 and multiple IPv6 addresses
    • Multiple IPv6 addresses

Note:  When the iBeacon Bluetooth adapter is installed, a message appears for 7 seconds to indicate the status of iBeacon enablement.

Please look at the video below to see a presentation for how to use iBeacon for AirPrint Discovery on Xerox® AltaLink® Family.

For additional information on the iBeacon, search on the term iBeacon in the online support for the model of AltaLink being used. Please contact your local support centre for further assistance.  

Xerox Certificate Remediation Utility: Fault Code 016-426 Revisited

An updated fix for the fault code 016-426 that is being seen on some of the VersaLink, PrimeLink, WorkCentre 6515 and Phaser 6510 printers has been released. A new utility, the Xerox Certificate Remediation Utility (XCRU), is now available to push the fix to the certificates in bulk to your fleet of affected printers.

The utility comes with a User Guide in the .ZIP file that will explain the prerequisites, how to install and use the utility, and the list of compatible products. Please read the user guide completely before using the utility.  You will also need to check the firmware installed on your printer. Make sure it is compatible with the XCRU.  

The utility should make it easier to install the fix on multiple printers.  To find the utility follow this link or navigate to the support page for one of the models of your printers that is displaying the fault or needs the certificates updated.  On the support page select the Drivers & Download tab and scroll down to Utilities & Applications. There you will find the XCRU, download the .ZIP file.  Find the user guide in the language you prefer.

A little review of the situation: Xerox has observed that some installed devices are displaying the fault code 016-426 and are not connecting successfully to the Xerox Global Remote Services systems.  The issue is due to a recently expired certificate included with the device firmware. The loss of this communication means that the meter reads, supplies replenishment information, and maintenance information has stopped being transmitted and reported.  This can impact billing and stop you from getting supplies in a timely fashion. 

The original remedy using a clone file was tested and published, but it was applied for each machine one at a time.  The new XCRU is available to push the fix of the certificates in bulk to your fleet of printers, saving lots of time and hassle. 

If you have questions or concerns about the Xerox Certificate Remediation Utility, please contact your local support centre

Xerox Remote Services Part Two: How to Stay Connected to Remote Services

It’s important to connect and stay connected to Xerox Remote Services. These services enable printers on your network to continue sending metered billing accurately, and allow them to be replenished according to your plan.

Please review Xerox Remote Services: Part One: The Advantages of Connectivity for more information on how these support meter reads and save you time and energy when it comes to reporting your meter reads.

Most current Xerox equipment comes with Xerox Device Direct functionality embedded directly inside. Some Xerox devices require a simple and free download called Xerox Device Agent – Lite (XDA-Lite). To see which option is available for your device  please review the Products supported by Remote Services website. 

Here are some important tips keeping your device or devices connected to Xerox Remote Services and ensuring you get all the benefits of networked printing and metered billing. at Xerox.

  • If you are using Xerox Device Agent – Lite (XDA-Lite)* to communicate back to Xerox, the software should be installed on a computer that’s always up and running. Connectivity will be lost anytime the computer is turned off.
  • Ensure that the XDA – Lite is up to date with the latest software version, available on the Support tab in the Xerox Remote Services Support and Software knowledgebase.   
  • Ensure your printer has the latest software version loaded for any products that have customer installable software.  Confirm you have the latest software by checking the Drivers & Downloads tab on your printer’s support page  under the firmware heading. 
  • Watch for security bulletins by subscribing to our free Xerox RSS feeds notifying you about patches or upgrades on connectivity. For instance, you can receive an upgrade for security certificates that have expired, avoiding   unnecessary device disconnections
  • Ensure that connectivity is not disrupted when/if your Information Technology (IT) department makes changes to your network.

These tips should help you maintain your connection to Xerox so that the information about supplies, meter reads, and diagnostics can be reported in a timely fashion.  Saving you time and effort. You can confidently know that your printer is taking care of the information reporting for you.  

*Xerox Device Agent – Lite (XDA-Lite) is a free Device Manager software application that not only enables Xerox Remote Print Services for the machine, but also provides a fleet management application that allows you to view the status of all Xerox Devices on your network right at your desktop.

Below is the link to install Xerox Device Agent (XDA Lite) software application US and Canadian versions.

Link to XDA (Xerox Device Agent)

Link to Canadian XDA (Xerox Device Agent)

Link to User Guide

Xerox Remote Services Part 1: Advantages of Connectivity

Xerox Remote Services is a set of features that simplify printer ownership and administration. It provides free services to enable administration of metered billing and supplies replenishment plans for printers on a network. Connectivity to the Xerox servers is an important part of this service.

Remote Services

Automatic Meter reads

Automatic Meter reads automates the task of collecting and submitting meter reads.  It makes the Meter Read process hassle free and less time consuming for you and the reads are always submitted on time.

Automatic supplies replenishment

Automatic supplies replenishment automatically orders certain supplies for your machine as they are needed.  You are less likely to be caught without the supplies you need. The orders are based on actual usage so no excess inventory, just the right supplies right when you need them.

Remote Diagnostics

Remote Diagnostics is available on newer devices and enabled when the new device is installed. This feature enhances the troubleshooting and repair process.   Diagnostic information from the machine will be sent to Xerox support teams to help diagnose issues and determine what the problem might be. If the issue can be solved remotely, remote diagnostics can help you resolve the problem at the printer and get you back up and running quickly.

Prepared Service Reps

If the issue requires a technician then the diagnostic information will be available to the technician. In addition, this information could make the repair process quicker and easier.

Our field service teams review the diagnostic information reported by your machines at the time a service call is requested. Therefore, arriving better prepared, with the parts they may need on hand.

Tell Me More…

To get more information about these features, check out the Remote Services at Xerox.com. The site covers all the information and has many useful links.  There is even a Capable Products document that will let you know if your device(s) can take advantage of the Remote Services.

There is Security White Paper that can answer any security concerns about the Remote Print Services.

Consider using Remote Print Services to save you time, just let your printer take it from here!!

Join us next time for Xerox Remote Services Part Two: How to Stay Connected to Remote Services.

Xerox® Clean Hands Reminder Screen Saver

As some of us begin emerging from our homes and return to work it is more important than ever to maintain good hygiene with frequent hand washing. Add another hand washing reminder to your workplace with the new Clean Hands Reminder App for your VersaLink®, AltaLink® and PrimeLink® printers. The app displays when the device is inactive. When the user touches any portion of the screen or a button, the app exits to the home screen.

The Clean Hands Reminder app is a friendly, non-intrusive, screen-saver type reminder to maintain proper hygiene located right on the screen of your printer.  It is a simple, silent reminder for users to protect themselves and co-workers. The app provides another tool for maintaining a clean and safe work environment.

The app can be added to any new or existing device in less than 2 min. The free download works with any ConnectKey enabled EIP v3.5 or higher. Please note the app does not include the i-series devices. The app is available globally with the titles and descriptions in English, Español, Français, Deutsch, Italiano, Português, Nederlands, and Türkçe.

To install this free app on your compatible devices, download the Clean Hands Reminder app from the Xerox App Gallery’s General section.  For your convenience there is a 2 minute How To video to walk you through installing the app.  The How To video is on YouTube on the Xerox Support channel. Or simply scan the QR code to watch the video.

Cleanliness is an important in this time of COVID-19.  In addition to the Clean Hands Reminder app Xerox has a site Xerox Print Devices Cleaning Guidance that provides ways to keep the external surfaces of your printers clean to help maintain a healthy work place. 

Remember some ways to fight the spread of COVID-19 is to clean surfaces frequently, wash your hands, wear face covering / mask and maintain your distance to help make your workplace a safer place for you and your co-workers.