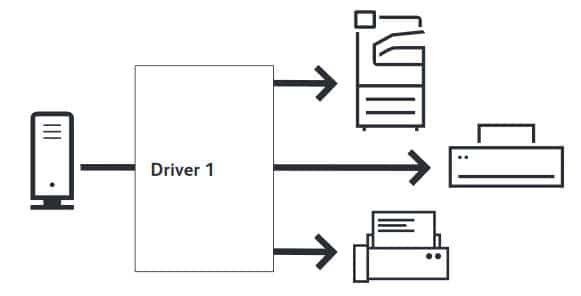
The Answer Is – Xerox® Global Print Driver™

The Xerox® Global Print Driver™ is the answer but what was the question? – Do you ever get tired of trying to figure out which print driver to use? Have you ever sent a document to a printer in another zip code because you picked the wrong driver? Have you ever wondered why you have a list of drivers longer than your screen? Those are just a few of the questions for which the use of the Xerox Global Print Driver (X-GPD) is the answer.  

The X-GPD is an easy to install and use universal driver that offers simplified use for IT staff or network administrators. The X-GPD offer convenience to those that are managing a diverse set of print devices, Xerox or others, across a network. The X-GPD will also greatly reduce the time and effort required to install and upgrade print drivers.

Okay I see those doubting faces but let me tell you about this driver, the Xerox Global Print Driver lets you print to almost any printer or multifunction printer, but wait there’s more. This Global Print Driver works with not only Xerox products but even those made by other manufactures. It is truly a universal driver supporting Xerox and non-Xerox printers PostScript and PCL.

One Xerox Global Print Driver to Many Printers

So what are some of the advantages of the Global Driver? The X-GPD allows IT people to create global print application settings like duplex or black and white printing to save costs. The common interface will also cut down on training when a new printing device is added to the network. Just plug-in the new device and give it the same IP address as the old printer (or redirect the port). The Xerox Global Print Driver automatically discovers the device and updates users’ feature options. No re-qualification or re-installation necessary! The user interface shows most-used features on the first tab, so users can easily find and select printer options. The driver is available in over 25 languages.

Videos are also available to help you use the driver. The videos are a quick way to become familiar with the Global driver and are helpful in training new users. I have included the ”Download and Install” video below. Others are available on the Video tab on the support page.

If you already have the Xerox Global Print Driver please make sure that you check occasionally on the driver page for new or updated releases of the driver and update your driver as appropriate.

Please take a look at the brochure for more information on this great driver. Then download your own copy of the X-GPD. Still want to know more? Check out all the information on the Xerox® Global Print Driver™ webpage. Need assistance while using the driver? Check out the Online Support for the X-GPD.

Cloud Connector Apps

Cloud connector apps help you create workflows that connect your multifunction printer (MFP) to your chosen cloud storage.  Cloud storage lets you scan in and share documents making it easier to collaborate. Printing documents stored in the cloud directly to the ConnectKey® Technology-enabled multifunction printer makes it easier for your mobile workforce to access the documents they need.  All of this is done with just a few touches directly at the MFP. Watch this video for a quick demonstration of just how easy it is to print from or scan to your cloud storage of choice. 

Is your cloud storage one for which we have an app?  Look at the list of current cloud storage apps below copied directly from the Workflow apps website. The links included with each description takes you to the app in the App Gallery where you will find additional information about the app.  The additional information includes sample screen shots, trial versions, system requirements, languages available as well as supporting documentation and more.   

Amazon WorkDocs: Stay organized by routing documents to the appropriate folders and transform paper into digitally accessible files with direct connection to the Amazon WorkDocs App from your MFP.
Learn more about Amazon WorkDocs App ›

Connect 2.0 for Box®: Easily print from or scan to an individual or shared Box account. As more organizations and workers are leveraging the convenience of cloud storage services, this app makes it easier to digitize documents, collaborate and work on the go.
See Connect 2.0 for Box app in gallery ›

Connect 2.0 for Dropbox™: Easily print from or scan to an individual or shared Dropbox account.
See Connect 2.0 for Dropbox app in gallery ›

Connect 2.0 for Google Drive™: Easily print from or scan to an individual or shared Google Drive™ account. This workflow app makes it easier to digitize documents, collaborate and work on the go.
See Connect 2.0 for Google Drive app in gallery ›

Connect 2.0 for Microsoft® OneDrive®: Easily print from or scan to an individual or shared Microsoft® OneDrive® account.
See Connect 2.0 for Microsoft OneDrive app in gallery ›

Connect 2.0 for Microsoft® Office 365®: Easily print from or scan to an individual or shared Microsoft® Office 365® account.
See Connect 2.0 for Microsoft Office 365 app in gallery ›

Connect App for Evernote: Securely scan and print directly to and from your Evernote account.
Learn more about Connect for Evernote ›

The skies the limit as they say.  With the connect apps take advantage of the cloud(s) and the flexibility it provides to your business.    

XMPie® Creating Personalized Experiences

XMPie® are software solutions for some of today’s marketing challenges. XMPie is a Xerox company.  XMPie platform has many solutions that feature the ability to create personalized marketing campaigns across several channels – print, Web, email, mobile, video and other media. Personalization draws attention to your message and is more likely to engage your customer to interact with your company. Below is an overview video that will point out some of the many advantages of the XMPie software solutions.

XMPie can also provide you with online web to print stores with campaign management, tracking and reporting. The online experience can be personalized using the tools in the XMPie array of products.  Please see the XMPie website for detailed information on the solutions available.  Case studies will give you ideas on how to best leverage XMPie solutions for your business and work processes.  The XMPie YouTube channel has a large library of videos to help you get information and ideas for how you can best use XMPie. 

To learn more about XMPie and download a free trial please visit the XMPie website.  More information in detail can be found on the XMPie website where you will find explanations of all the products offered by XMPie.  There are case studies that highlight the success that businesses have had with the XMPie products as well as information on training available. Trial versions and videos are also available. Support tools are also available on the XMPie website including a knowledge base, tutorials, documentation and more.

Take a look at what is available and how these products can enhance your targeted and personalized communications with and for your customers.

CMKY+ and the Xerox Color C60/C70

Looking for a way for your prints from your Xerox Color C60/C70 to have that extra something to get them noticed?  There is a new accessory available, Xerox Adaptive CMYK Plus Technology, which we will refer to as CMKY+.  The accessory gives you the ability to add four CMKY+ toners to your print capability. CMKY+ let’s you add gold, silver, white and clear.  With the addition of these four toners you can make your prints even more eye catching and impressive.   You can utilize these new colors in  high volume applications  such as greeting cards, flyers, invitations, posters, and signage of all kinds.

The addition of the CMKY+ technology opens up new revenue avenues. The extra colors also help you expand your imagination and creativity.  Think of the prints you can create and the options you can offer your customers.  The possibilities are endless and the results are amazing.  The CMKY+ toners work with a wide range of media including luxury silk, colored media as well as all the media that can be used on your Xerox Color C60/C70.

In the online support for the Xerox Color C60/C70 there are several cases available.  One of these cases will give you tips and best practices when using the CMKY+ accessory.  This case also includes space requirements, color management, design considerations and more.  To find the cases for the CMKY+ navigate to the online support for Xerox Color C60/C70 and search on CMYK+ or CMYK plus to find the cases.  Additional information is also available in the brochure.

Bring the bling and get noticed for your prints. Enter new CMYK+ digital print markets by offering applications created with glimmering golds, sparkling silvers, clear highlights and bright whites, all in one single digital print pass. Just imagine the possibilities!

Settings Report: Know Your Printer

Let’s talk about the Configuration, System or Settings Report (the name of your report may vary depending on your machine model). This report has tons of information about the machine and can be so helpful for so many reasons. The report will tell you what options you have available, which options are enabled and how your machine is set up. The report tells you how your defaults are set and the IP address if it is a networked printer. These are just a very few of the items listed on the report.

The video below shows how easy it is to print the configuration, system or settings report. This video is for the Xerox AltaLink family of printers but the steps are similar on most machines.

Why should you print this report? There are several good answers to that question,  if you have a service call placed it may help the technician solve the issue or it can help you reset any options that may be changed during the call. If you buy or have another machine you can use the report to set the machine up the same way. If you use  Support and Drivers, call in for support or use Chat the report may be needed to find out information about your machine. Finally, if the office gremlin changes something when no one is looking you can use the report to reset your settings.

It is a good idea to print the report periodically so you have a current one on hand if the need arises. Some people leave the report at the machine or store it in a folder near the machine. You will see some things that don’t really make sense like random numbers and letters, but surprisingly that stuff actually makes sense to somebody. To find out how to print the report just go to the Support and Drivers Page on Xerox.com and enter your model number. Search on configuration or settings to find the instructions for printing the report.

Many machines have an option to have the configuration report print automatically when the machine is turned on. That may be too much for some users and become a waste of paper. The automatically print the configuration page on power on setting can be disabled so that it will not print out automatically but you can still print the report on demand. To find the instructions for turning off the automatic print just search on configuration and look for the case titled How To Enable or Disable the Configuration / Startup Page When the Printer is Powered ON or something similar and follow the instructions.

Please consider printing out the configuration/settings report so that you have it handy when you need it.

Windows Pop-up When You Try to Print

Are you getting a Windows Pop-up window when you try to print to your Xerox printer?  You are not alone.  If you have recently updated Windows 10 64-bit Pro to version 1903 build 18362.267 you may see the pop-up.  The pop-up is asking you to sign in or create an account.

Here is a short explanation of what is happening – the Windows update installs Office as an app even if you already have the full Office suite installed.  You can uninstall the Office app but as soon as you send a print command, the app will automatically reinstall and the pop-up window displays. If you are using accounting on the Xerox printer, the pop-up from Windows displays at about the same time the pop-up for entering your accounting code displays.  Below is a screenshot of the pop-up window you might see.

You will also see the pop-up even if you do not have accounting enabled on your printer.  Therefore, accounting is not the issue.  The issue happens on several models of Xerox printers and multifunction printers.  Microsoft says it is an issue with Xerox and Xerox says it is an issue with Microsoft.  Both may be partially right.  It seems to have started with the Microsoft update for Windows everything seemed fine before the update. 

Regardless of why or how it happened, let’s fix it so you do not get that pop-up. The fix is to uninstall the product specific driver and install the Xerox Global Print driver. Using the Global driver either PS or PCL seems to fix the issue. 

Find the current Global Drivers on the Drivers & Downloads page for the Global Driver. Please see the instructions for installing the Global Driver here.  If not automatically selected, make sure that you manually select the correct Device Compatibility Pack (DCP) for your printer.  For instructions on selecting the DCP please see the Device Compatibility Pack Customer Tip.

This should fix the problem of that pesky little pop-up window.  Let us know if it works for you or not by leaving us a comment here in the comment section of the blog. 

Watermarks: No Water Required

Looking for a way to tag your documents as a draft or label it as confidential, then watermarks may be the answer for you. A watermark is an image printed in the background of a copied or printed page or pages. You can also use watermarks to put a version number or a date on a document. There are several predefined watermarks you can use or you can create your own. The watermark is a handy feature on many of our printers and multifunction printers including the Nuvera Digital Printing Presses, VersaLink and AltaLink products. Here is a video showing the watermark setup on a Phaser printer.

I like watermarks because it is a visual representation to let me know I am working, for instance, with a draft version of a document, this is very helpful for documents that are printed out multiple times for editing and revising. Watermarks can also be used to put your name on a document you created, that way no one can take credit for your work!! Watermarks are a simple way to secure your confidential or intellectual property. The marks can be customized; you can choose the size, orientation, font and even color of the watermark to fit your needs.

Notes:

  • Not all options listed are supported on all printers. Some options apply only to a specific printer model, configuration, operating system, or print driver type.
  • Watermarks are not supported for some print drivers when booklet is selected or when more than one page is printed on a sheet of paper

Watermarks can also be added to copies on some of our machines. Standard watermarks available for copies include the words Draft, Confidential, the Date and Time, a Control Number or a watermark of your creation. The watermark is a great security feature as well because they cannot be removed or manipulated, as you might be able to do with a header or footer..

To learn more about the watermarks available on your machine please search for “watermark” in Online Support for your model printer. To get to your printer’s support page click here and enter your printer model number, then type “watermark” in the search field. Watermark is also available through the Global Print driver.

Below I have added the screenshot of the Watermark Editor on the Windows drivers. Remember your screens may vary depending on your model of printer and how your machine is set-up, so these screenshots are only examples. Example, another good watermark word!!

Gmail and Your Xerox Multifunction Printer

An estimated 1.5 billion users worldwide use Google Gmail™.  As such, it is the most widely used web-based email provider. Recently there have been several questions about how to set up Xerox multifunction printers that have Scan to Email to work with Google Gmail.  In this blog post I will try to answer some of those questions.

Not all printers will support this setup.  Printer family will decide what the screens look like. You can always refer to the support pages for your specific model for more details. Let’s look at the information and steps for setting up your Xerox multifunction printer to work with Gmail. The steps may vary on your printer but the principles of the setup will be similar.

Pre-requisites:

  • An existing Gmail account.
  • Current firmware loaded on your Xerox multifunction printer.
  • Time/Date and DNS must be correct, time has to be within 3 minutes of current. If Smart eSolutions is working and the time is correct continue.
  • Do not use Chrome web browser, OR MS Edge if you have Win10 and are fully up to date, both are based on Chromium and password fields and some check boxes will not work properly.
  • You may need to change settings in Gmail to allow less secure apps when scanning to Gmail.  The steps are as follows:
  1. Access the Gmail Account used for the SMTP Server Login.
  2. Select the Gear menu at the top right corner.
  3. Select Settings.
  4. Select Accounts and Import.
  5. Select Other Google Settings.
  6. Select Sign-in & Security.
  7. Scroll down to the Apps with account access section.
  8. Set Allow Less Secure Apps to ON.

Setup Scan to Gmail Instructions for AltaLink (other model’s steps will vary) 

  1. Access the Embedded Web Server and login as System Administrator.
  2. Select Properties.
  3. Select Configuration Overview.
  4. Select the Settings button for the Email App.
  5. Select the Edit button for SMTP.
  6. Enter a Valid registered email address that is using Gmail as its mail server on the Required information Tab in the Device Email Address field.
  7. Select Hostname radio button.
  8. Enter smtp.gmail.com as the hostname.
  9. Enter 587 as the Port number.
  10. Select Save.
  11. Select the SMTP Authentication Tab.
  12. Select Device for both the User Jobs and System Jobs sections.
  13. Enter the LoginName and Password credentials for this Gmail account setup.
  14. Select Save.
  15. Select the Connection Encryption tab.
  16. Select the radio button for STARTTLSS (if available).
  17. Remove checkmark for Validate Server Certificate.
  18. Click Save.
  19. Access the DNS settings in the Connectivity section of the Properties Tab.
  20. Ensure domain is set to gmail.com
  21. Ensure DNS matches network DNS order.
    Note: You can perform an ipconfig /all from a command prompt on the network to confirm DNS servers and prioritization order.
  22. Add an Alternate DNS server of 8.8.8.8.
  23. Select General Setup from the left hand side menu.
  24. Select Date and Time.
  25. Ensure the Date, Time and time zone is correct.
    Note:  NTP is selected by default, if the network does not use an NTP server turn off the Automatic using NTP option and set time and time zone manually.
  26. Select Apply if any changes were made.
  27. Login into the Gmail account that the machine is using in a web browser.
  28. Go to the Google Account and ensure Less Secure apps is enabled. Preferably turn off 2 step verification.
  29. Access the Embedded Web Server again for the printer.
  30. Select Properties.
  31. Select Configuration Overview.
  32. Select the Settings button for the Email App.
  33. Select the Edit button for SMTP.
  34. Select the Test Configuration tab.
  35. Enter an email address in the To Address to send a test email.
  36. Select the Send Email button. A confirmation that the test email was successfully sent should appear.
  37. Ensure the email appeared in the inbox for the desired recipient.

You should now be able to email using the Google Gmail account.  If you need more information please consider contacting your local support centre, consulting your online support page or you can always ask for information from others that are using the setup on the Xerox Community Support Forum.

Fax Faults on Xerox Multifunction Printers

I know many of you are still using your Xerox multifunction printers (MFP) to fax documents. Sometimes you are getting fault codes such as Fault Codes 033-503, 035-701, 133-242: Error occurred during Fax Transmission and other fax codes and messages. Let’s take a look at some of the things to try or check to clear the faults.

First, make sure you are dialing the correct number to reach the receiving fax. You can try dialing the number from a phone and you should hear those lovely beep and squawk fax tones that mean little to us but it is the language of the fax. If you do not hear those tones check the phone number and try again. In addition, you can try a different fax number to see if it is just a problem with that one fax number you are trying. If a different number works and you can send then contact the people at the place of the problem fax number and have them check their fax setup and let them know your fax is unable to send to theirs.

If the number is correct and you are still having trouble connecting unplug the Xerox machine from the phone line and plug in a regular telephone. I hope that you have one you can try. With the regular phone plugged into the line try to make an outbound call to a regular phone number. Is the connection free of static, popping sounds or voids? Are you able to reach the number you dialed? If the answer to these two questions is yes then your phone line is okay. If you answered no to either question contact your phone company or communications person in your office to have them check the phone line.

If you were able to make the call and the line is good make sure it is a dedicated analog line not digital or voice over IP (VOIP). Faxes may fail and/or results may not be consistent with a digital or VOIP lines. Dedicated analog lines are recommended for faxing activity.

If the fax still fails make sure your machine has been updated to the latest firmware for the machine. If all this checks out and you still cannot send a fax well you can by a stamp and mail the document snail mail! That wouldn’t really help, if it still does not work you can search the support pages for your machine for additional information on any codes or messages you are seeing on your machine or you could contact your local support centre for additional assistance.

Calling All Educators!! Part 2 – The Apps

Welcome back to part 2 of Calling all Educators.  Today we will be looking at the apps available specifically for the Education sector.  In the app gallery there is a section just for the education apps.

The Xerox App Gallery is an expanding collection of downloadable apps for your Xerox ConnectKey printers and MFP (multifunction printer) as well as the VersaLink and AltaLink families of printers. Apps from the gallery help to simplify complex or repetitive, time-consuming processes and extend your printer’s capabilities.

Let’s look at the specific education apps that are available. All the descriptions are paraphrased from the descriptions available for viewing in the App Gallery.

Connect for Blackboard

Connect for Blackboard is a Xerox® connector app to Blackboard Learn™, the learning management system for higher education where teachers and students can collaborate, upload and store documents for classes.  With this app you can scan hardcopy course materials course folders right at the MFP. You must have an existing Blackboard Learn account. Supported output file formats for scan: PDF.  See this video for a quick overview of the app

Connect for Moodle

The Xerox Connect App for Moodle requires a Moodle account. The app digitizes  hardcopy documents. Authenticate at the printer once and access a Moodle account, browse a Moodle folder structure, and upload coursework, assignments, notes and more.

Remark Test Grading

Connect for Remark Test Grading is a Xerox® app to connect to Gravic’s cloud-based test grading service. Educators can access the Remark Test Grading Service at the MFP and print bubble tests for their class, scan in the completed answer sheets, and generate instant results. The app automates the grading workflow with one scan.  Once scanned you have instant access to print or email students their grades and produce multiple reports to summarize class performance.

You must have an active Remark Cloud Account with the Xerox® Connector enabled on that account. If you are a new or existing customer of Gravic and are using the app for the first time, you must contact them to have this update done to your account; it is not enabled by default. To do so, you can contact them at sales@gravic.com.

If you do not have an account, you can go to https://remarksoftware.com/products/test-grading/xerox-cloud-trial/ to request a trial. Once you have your trial, ensure that the Xerox® Connector is enabled.  See how the app works in this video:

Xerox Proofreader

This app is only available for English language.  Xerox Proofreader Service gives you instant access to a powerful tool that checks for spelling, grammar, style, and plagiarism right from the MFP. A report with suggested corrections can be printed and/or emailed to you, all right from you multifunction device. Users also have access to a web portal at https://xeroxproofreader.com to upload electronic documents for instant feedback. Scan or upload for fast results, giving you more time to focus on content, not corrections. This app Ideal for teachers and students. For documents scanned in at the MFP or submitted via the portal, reports will be available in PDF Format. Another feature of the app text can also be entered directly into the portal’s writer tool, checked, and exported as Word or PDF documents.

See this app in action in this video:

Book2Go

The Book2Go app is for providing scan functionalities to devices at public places such as. libraries, colleges, universities etc. without the need to be part of the local network. After scanning, the app displays a QR code on the screen of the MFP. You can scan the QR code and the document is downloaded right to your eBook readers, tablets or mobile devices. As the name of the app is Book2Go it supports multiple pages, job building and page splitting.

You can try out this app for 30 jobs. After the trial period a purchase is required to use this app.

These apps all come with a trial so you can try them first.  Most apps are available in multiple languages, see the app descriptions for a list of the compatible languages. Documentation and support for the apps is provided in the individual app pages in the app gallery.  While you are in the App Gallery check out the other apps available in addition to the education apps, you might find a cloud app or a business app for example, that would help you further automate your processes. 

All the resources to help you utilize the apps is at your fingertips.   

To all the teachers, administrators, students and parents out there have a great 2019-2020 school year!!