
Remote Print Services is a set of features that simplify printer ownership and administration. It provides free services to enable administration of metered billing and supplies replenishment plans for printers on a network. Today we are going to look at how to set these services up on the VersaLink and AltaLink families.
Automatic Meter reads automates the task of collecting and submitting meter reads. It makes the Meter Read process hassle free and less time consuming for you and the reads are always submitted on time.
Automatic supplies replenishment automatically orders certain supplies for your machine as they are needed. You are less likely to be caught without the supplies you need. The orders are based on actual usage so no excess inventory, just the right supplies right when you need them.
To set up this feature on the VersaLink family of machines:
To enable Remote Services:
- In the Embedded Web Server, log in as administrator, then click System.
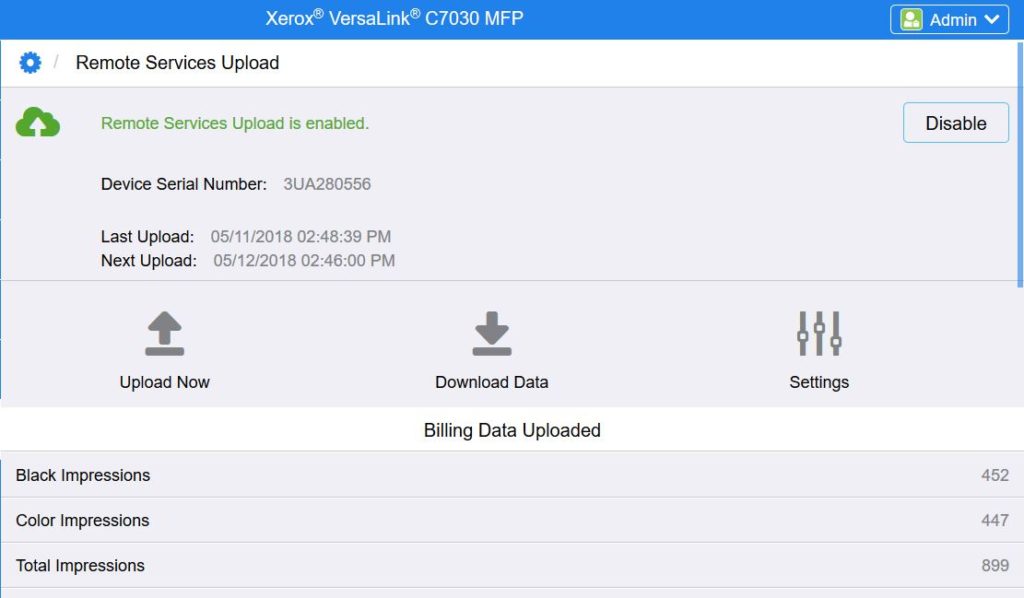
- Click Remote Services Upload.
- To enable Remote Services Upload, click Enable.
- To send billing and supplies information from the printer, click Upload Now.
- To allow the printer to request data from Xerox, click Download Data.
- Click Settings.
- To synchronize the printer with the Xerox Remote Services datacenter, in the Schedule Upload area, type the time of day to upload the billing and supplies information. Use 24-hour format.
- To configure email notifications for remote services, in the Email Notifications area:
- Select the events when you want to receive notification.
- Type up to five email addresses to receive the notifications.
- Click OK.
To set up Remote Services on the AltaLink family of machines:
Before you begin, if your network uses an HTTP proxy server, you will need to provide information about your proxy server in the steps that follow.
Configure Remote Services:
- Access the Embedded Web Server and login as System Administrator.
- In the Embedded Web Server, click Properties > General Setup.
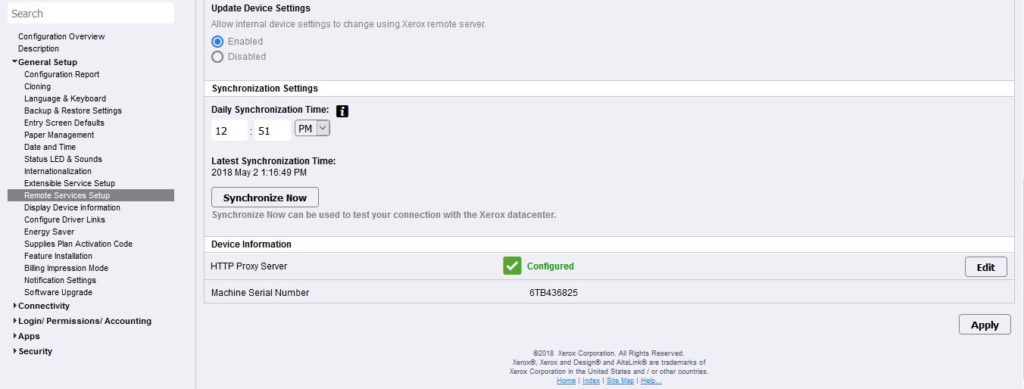
- Click Remote Services Setup.
- For Remote Services, select Enabled.
- To allow the device to request software files from Xerox, for Remote Software Download, select Enabled.
- To allow the device to synchronize with the Xerox licensing server, for Feature Activation, select Enabled.
- To allow a Xerox remote server to modify internal device settings, for Update Device Settings, select Enabled.
- To synchronize the device with the Xerox Remote Services data center on a defined schedule, daily, for Device Synchronization Time, type the time.
- To verify communication with the Xerox Remote Services data center, click Synchronize Now. A status message shows the result.
- If your network uses an HTTP proxy server, to set or update your proxy server, for HTTP Proxy Server, click Edit and enter your HTTP proxy server information.
- Click Apply.
- Logout of System Administrator mode.
To get more information about these features, check out the Remote Print Services at Xerox.com that covers all the information and has many useful links. There is even a Device Eligibility Test that will let you know if your Device(s) can take advantage of the Remote Print Services.
If you have additional questions, check out the FAQs for Remote Print Services that will answer your questions about the Xerox Remote Print Services.
Also there is Security White Paper that can answer any security concerns about these Remote Print Services.
Consider using Remote Print Services to save you time, just let your printer take it from here!!